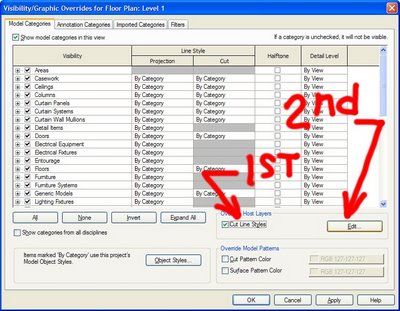
If you want to change these for all subsequent projects do this in your Project Template. At the command prompt...just kidding, I only want to make sure you're present...In a Plan View type V V (or VG but I find V V is faster, being just one letter repeated), there you will see the following...(follow the red arrows below)...

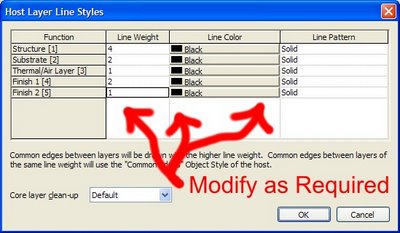
When we check the Cut Line Style box, then Edit we get to the dialog below (this is where we actually make our changes).

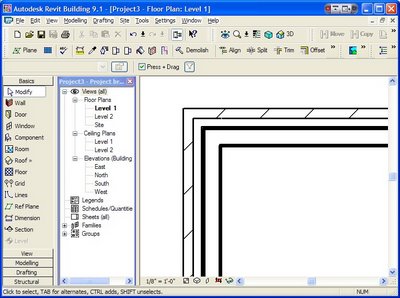
After we OK all the way out, your walls will reflect the changes you made, given that you made changes and are either in Medium or Fine Mode. (but wait, we're not home yet...) The example below illustrates the framing (structure) as being the most bold, since I always (or nearly) dimension to structure.

If you'd like these changes to become standard and or typical there is some thinking that we must do and some questions we must ask before we go on. Do these styles want to be different at different scales? Do they just want to be this way in Plan? etc., etc.
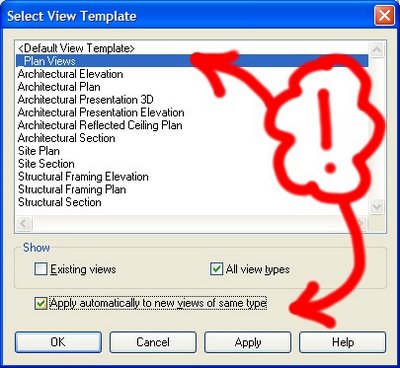
Either way when we make the appropriate choices for our needs we would create View Templates and apply them according to where they're necessary. I created these test images from a Plan Views 'View Template' but in real projects I normally have view templates for each different scale, in addition to Plan, RCP, ELEC. views at different scales, etc...There is a final (???) question to ask ourselves: Do these "Apply automatically to new views of same type"? (see image below). I find this is a 'sometimes' choice so be careful with that one.

Have a good time with this one, its fun and tasty.
No comments:
Post a Comment